Outcast Engineer Challenge Guide

Made adjustments in the guide for patch 4.4:


There are 30 challenges for the Outcast Engineer. Here is a guide to help you complete them.

  1. Pest Control - Use the Crank Gun to kill 100 climbing enemies.

This can be done as you complete other challenges and play the game normally. Just keep in mind to blast some hordes as they try to climb up on certain parts of maps.

  1. Targeting Array - As the Outcast Engineer, score 6 subsequent headshots on Elite enemies using the Masterwork Pistol.

Make sure you don’t have Armour Piercing Slugs on, which will cause penetration and can cause you to fail this. You can use a map like Empire in Flames which guarantees you two Chaos Warriors in the start of the map and guarantees Chaos enemies in general. 6 headshots is all it takes to finish this, and then you must complete the map.

  1. Superior Technology - Kill 15 Ratling Gunners using the Steam-Assisted Crank Gun (Mk II).

Using the talent Gromril-Plated Shots you can easily dispatch the armored Ratling Gunner specials with your Crank Gun.

  1. An Eye for a Target - As the Outcast Engineer, score 1,000 headshots with the Masterwork Pistol.

This is likely going to be a grind. One way to help with that is to start a Send in the Next Wave deed on a map like Righteous Stand, then stand next to the ammo box at the end of the level where enemies will congo-line towards you. This is also a good spot to pick up cliff kills if you need it for Pest Control.

  1. Tinkerer’s Tempo - Successfully maintain max Pressure for the Crank Gun as it is about to drop 100 times.

Using the talent Experimental Steam Capacitors, this challenge is much easier to complete. When your stacks are about to expire, give it a crank. It also won’t expire your stacks to shoot or hit max energy, so you can just shoot a few shots and then crank to keep your stacks up.

  1. Fundamental Force - As the Outcast Engineer, cause 200 enemies to fall to their deaths using the Cog Hammer.

On Righteous Stand when you pass the second grim, you get a drop down and proceed along a cliff edge. That spot should be fairly easy to cliff enemies at using the Cog Hammer. Send in the Next Wave deed can also help here.

  1. Field Trials - Complete a mission killing enemies only with the Crank Gun.

If you want to take the easy route or do it alone, load up a recruit mission on something like Athel Yenlui or Against the Grain and just go through it killing only with the Crank Gun. Move through the map as fast as you like. Talents like Experimental Steam Capacitors and Innovative Ammo Hoppers will likely make your life easier. Avoid getting kills with barrels. You can use your melee weapon to block and push, but be mindful that if you push an enemy and it dies to terrain (like cliffing), the kill will be attributed to you.

  1. I Love the Smell of Black Powder - As the Outcaster Engineer, shoot an ignited explosive barrel and have it kill 10 enemies.

Skaven hordes are the best because the super fragile slave rats will be ideal fodder for an explosive barrel. Might want to let more than one group pile up before destroying a barrel. Having someone use a shield and keep the enemies back while more pile up is also helpful. Corralling enemies by using a hallway or something similar is also helpful.

  1. Endrinkuli’s War Song - Fire the Steam-Assisted Crank Gun (Mk II) for 40 seconds in one activation.

Innovative Ammo Hoppers is really useful here, instead of trying to chain concentration potions with Decanter/Proxy from team mates. If you’re having trouble keeping it going, you can get it easily by going on Horn of Magnus and starting the Assassin event (Pouch Pilferer challenge) near the start of the level.

  1. Come to Bardin… - Find the lost cog.

Located in the keep, it can be found in several locations. If I missed or something is wrong, let me know.


The next 8 challenges are just normal playthroughs.


  1. Trial by Plague I: Outcast Engineer - Complete all Helmgart missions on Recruit difficulty as Outcast Engineer.

  2. Trial by Plague II: Outcast Engineer - Complete all Helmgart missions on Veteran difficulty as Outcast Engineer.

  3. Trial by Plague III: Outcast Engineer - Complete all Helmgart missions on Champion difficulty as Outcast Engineer.

  4. Trial by Plague IV: Outcast Engineer - Complete all Helmgart missions on Legend difficulty as Outcast Engineer.

  5. Optimised for Battle - Complete 25 missions as the Outcast Engineer.


For all the Proving Ground challenges, you can avoid a failure by leaving the game before the “Defeated” message appears and you can’t access the menu any more. Or you can play it normally, win or lose. If you do decide to leave to avoid failure, please only do so as client, not host. Be courteous to your fellow rat slayers.

  1. Proving Grounds: Plague - Complete Act 1 without failing a mission on Legend difficulty or above as Outcast Engineer.

  2. Proving Grounds: Darkness - Complete Act 2 without failing a mission on Legend difficulty or above as Outcast Engineer.

  3. Proving Grounds: Unholy - Complete Act 3 without failing a mission on Legend difficulty or above as Outcast Engineer.


  1. Interception Barrage - Hit a leaping Rat Ogre with a bomb as Outcast Engineer.

If there is a magical way of making Rat Ogres leap more often, you’ve got me. You can try using stealth to lose aggro at a distance and hope he jumps. Backing away from him while he comes towards you might yield mixed results. You can also get a speedy character like Handmaiden without stealth and have her dash and run from him to create large gaps that might proc a jump. Screaming Bell guarantees a Rat Ogre 100% of the time and is ideal for this.

  1. Ong, Tuk, Dwe, Fut, Sak - Throw 5 Bombs at a single monster as the Outcast Engineer.

Grenadier trait on Trinket and triple bombs will hopefully allow you all 5 bombs on a monster. Have bots/team mates give bombs if that isn’t enough.

  1. We Have the Technology - Kill 3,000 enemies with the Crank Gun.

Armour Piercing Slugs, Experimental Steam Capacitors, and Linked Compression Chamber/Innovative Ammo Hoppers talents will help here. Unleash volleys into hordes. You should achieve this naturally but can use a Send in the Next Wave deed to make it faster.

  1. Mass Destruction - Kill 50 enemies in a single Crank Gun barrage.

Armour Piercing Slugs, Experimental Steam Capacitors, and Linked Compression Chamber/Innovative Ammo Hoppers talents will help here as well. Concentration potion before a volley may also help, but honestly it’s probably gratuitous at that point. Let a big horde come and then unleash into them. Dragging a bunch of ambient mobs along with a horde can also help. Twitch Mode can help if you’re really having a tough time.

  1. Targeting Calibration – Kill a Monster, a Special, and an Elite in a single Crank Gun activation.

Gromril-Plated Shot/Innovative Ammo Hoppers and concentration potion might be useful here but aren’t necessary. Make sure you have an Elite around along with a Monster. When the Monster has low hp, wait for a special and then use the Crank Gun to kill all three enemies in whichever order you see fit.

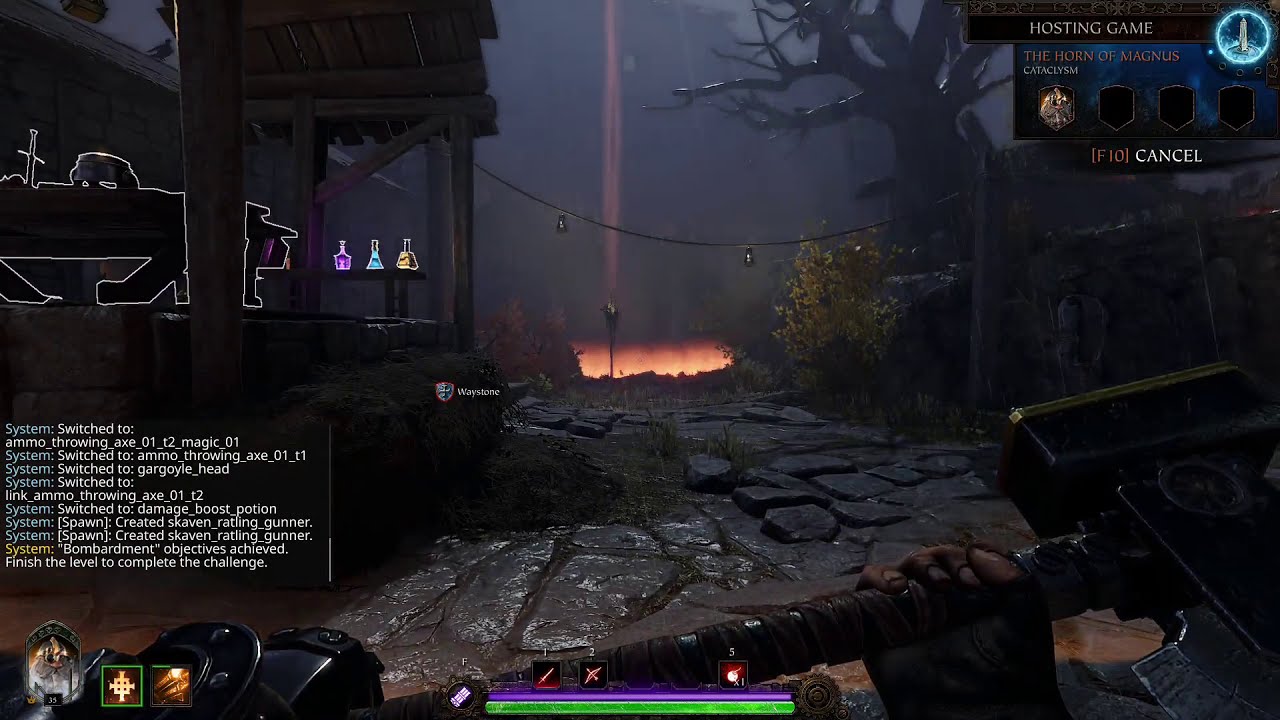
  1. Bombardment - Using a Bomb, Kill a distant Ratling Gunner as Outcast Engineer.

The Bombardier talent is ideal here. Hit a Ratling Gunner directly and it should die on any difficulty. A strength potion shouldn’t be necessary. The range for this has to be greater than 25. To give you an idea, Standard Bearers’ standard has a radius of 15. So if you kill a Ratling Gunner at a distance equal to or greater than a Standard’s diameter (30), that is more than sufficient.

  1. Like Cogwork - Slay 1,000 enemies with the Cog Hammer as Outcast Engineer.

Smash away at the ratties! Nothing special here. Scavenged Shot and Superior Gaskets talents can help here though.

  1. Tech, No Mage - Use the Cog Hammer to kill a Blight Stormer, a Leech, and Burblespue Halescourge as Outcast Engineer.

This can be done on different maps and through multiple playthroughs. Just deal the killing blow with the Cog Hammer. Blight Stormers sometimes have a tendency to teleport near you if they lack line of sight.

  1. Peacemaker - Kill 150 Elites and Specials with the Masterwork Pistol as Outcast Engineer.

The Steam Pistol is strong at closer ranges. It should make quick work 1-2 shotting many enemies. You should obtain this naturally without having to try for it.

  1. Stout Heart, Steady Aim - Using the Masterwork Pistol’s alternate fire, shoot a Monster 12 times without missing as Outcast Engineer.

It’s important to note that it should read “shoot Monsters 12 times” instead of “shoot a Monster 12 times”. It’s worded wrong and you can use the alternate fire close to Monsters to help with accuracy. You can shoot different Monsters throughout a map to achieve this. It does not have to be the same Monster. Maps with guaranteed Monsters are useful for this, such as Against the Grain or Screaming Bell.

  1. Where’s the Kaboom? - Kill 500 enemies using Bombs as Outcast Engineer.

Just be liberal with your bombs on hordes and this should come naturally.

  1. Patent Pending - Complete all Outcast Engineer challenges.

No longer requires all the Trial by Plague, Proving Grounds, and Interception Barrage challenges to be completed.
8 Likes

Did those two Halescourge after second tome before the drop, where the two wooden planks are layed over the river. Worked like a charm there. “An Eye for a Target” works best there if the ammo box spawned on the corner where the way splits towards the second tome.

There seems to be uncertainty if it works with event-barrels. My suggestion would be to pull this of with a skaven horde and right next to a drop, since the horde will pile up very condensed. Hunger in the Dark works well at the drop after first grimoire, since it has both a drop and a guaranteed explosive barrel up on the ledge.

Fortunes of War is the absolute best place for this for obvious reasons.

2 Likes

@Pershing explained how to trigger it not too many days ago in this post, but all his posts and the videos themselves got removed. You can still see @SirKruber react to him and the links (which lead nowhere now).

He removed the videos because it showed the rat ogre glitching out where he was trying to do a slam walk but couldn’t and started wiggling.

I think it’s funny how people have to use glitches to get a challenge done. It just shows there’s something wrong with his initial triggers.

I’ve tried helping my friend get this challenge at least 40x and we’ve tried every single suggestion given here in the forums. Nothing has worked. We can’t even get the rat ogre to glitch out like in Pershing’s video.

We have essentially given up. Maybe one day it’ll get fixed.

2 Likes

aah the infamous Fatshark Maybe one day it’ll get fixed^TM

Comes packaged with the dedicated servers!

1 Like

Great initiative, great tips. Some additions:

  • The pistol is very accurate when you crouch, which makes its headshot challenges a lot easier. Might mention that in the guide, because not everybody is aware.

  • Skittergate might well be the best map for “Stout Heart, Steady Aim”, because of Gatekeeper Naglfar & Deathrattler + maybe a random monster.

  • The pit / cellar / dropdown thing with the ammo box in it before the dropdown to the second grim on Into the Nest is a great spot for the barrel explosion challenge. Just kill the bots, get your back against the wall with a shield (before you align the waterwheels) and wait for a horde. Just push the first line away, then more skavenslaves will take their slots by jumping down, until there is superdensity in the pit. Then push the ratties to make space and shoot the barrel.

  • The streets in Screaming Bell are a good spot for the Bombardment challenge. A GK bot that supplies strenght potions does help by making your throw easier, because the kill radius is bigger.

  • @kuli helped me with the jumping Roger challenge. He is aware of a way that might trigger a Roger jump. He can probably explain better, but as I understood you need to be a specific distance away when Roger switches aggro. Worked really well.

  • The last Troll on Hunger in the Dark is a great target for the 5 bombs challenge.

I have everything but the jumping rat ogre. I’ve killed 70+ in the last few weeks but can’t get them to jump even on 200% twitch 'cos of the damn bots. It’s beyond frustrating. I’m so sick of the Engineer now I never wanna play this shitty class again.

Fatshark never cease to amaze me with their incompetence. I’m pretty sure they only play the game with other people in the office and just assume that their entire playerbase are part of a pre-made team - didn’t you learn that this isn’t the case from the unpopularity of weaves? And just like GK, when OE launched we had a multitude of single player lobbies in which we were all trying to complete the challenges with bots - so shouldn’t you actually test your game under these conditions and give us challenges that are actually feasible?

There is a way to bait an almost guaranteed leap from Roger on Screaming Bell, which is best performed on Recruit on Solo and requires a VERY specific setup. I’ve just tried it out and it works very consistently, it wasn’t just a fluke when I got it.

Here is how you can all pull it off:

  1. The setup
    Here is your shopping list what you should bring along:
    a.) Hammer and Shield, any stats
    b.) drakefire pistols, preferably with Therma Equalizer (you need it to get rid of mobs while Roger is chasing you)
    c.) Piston Power (This is VERY important. You won’t be able to pull this one of with Ablative Armour)
    d.) Speed Property on Trinket (the 5% more Movement Speed will make a difference)
    e.) 3 100 health class bots ( I used Shade, BH and HS)

  2. The Map
    Screaming Bell (Duh)

  3. The attempt

Okay, first of all, you want to get rid of the bots over the course of the map. Screaming Bell makes this actually VERY simple even on Recruit. While FF is out of the question, you can still FF kill bots with explosive barrels, which spawn quite abundently on Screamin Bell. To make things easier, pick up the grims and don’t let your bots have curse resistance. You will be able to incap them with one or two explosive barrels. Carry them yourself to get a triple kill, get rid of the grims, and on goes your solo experience.

Now, when you reach the finale, destroy the chains as usual, get rid of all the mobs, and then dance with the roger. BUT, you don’t stay up at the bell-event, you drop down and let the roger chase you until you are at the down at the corner where the spawn of teammates is (where you turn left to head towards the straight road to the finish). There, your game begins. Get rid of the mobs as good as you can, then let the roger chase you up the slope you just came down, again, as far up as you can. There, your piston power comes into play: You use your shield strike to stun the Roger, and then quickly make your way all the way down again. Get as much distance between you and it as you can, while still remaining in its line of sight.
Roger will have ALOT of trouble following you, because he will attempt to climb down even the smaller bumps in the terrain, which will massively delay his chase. You are now, roughly, in the perfect distance that triggers his leap, and since his pathfinding REALLY doesn’t like climbing after you, it will trigger the leap very often if you did everything right. I am also under the impression that Roger will initiate a leap more often if he is on higher ground.

Like I’ve said, I just tried it again after getting the challenge this way. Try it, you’ll see it’ll work.

I do recommend doing this on Recruit, since you will need Piston Power and cannot run Ablative Armour. Even on Veteran, you might need one or two tries till you get everything right, and since mobs do spawn frequently, you will be glad to take as little damage as possible. Also increases the chance of bombs spawning where you dance with Roger, and since you still have to hit it with your bomb (which is easier said than done, because he jumps from a rather akward angle), you will need all the bombs you can get.

Roger will even sometimes jump when following you up again, but the leap is usually two short for you to react. My setup is not only pretty consistent, you will have plenty of time to get you bomb out and wait for Roger’s leap, and while the angle might be unusual, due to him leaping from higher terrain, he has ALOT of air-time, so you can actually wait for the best moment.

Happy hunting!

4 Likes

Does that ohe work in weaves? There is a lot of monsters there and I got some challenges done in weaves (like the GK challenge where you have 5 seconds between finishing quests). Some other challenges do not work there.

Also what does the skin unlocked look like? I haven’t found a picture yet.

Cheers!

Hello Guys,

Do you have any info about "Bombardment"challenge? I think this challenge need to be fix.
I’ve started “Fortunes of War” - take some bombs from the chest and waiting for the gunner. Few of them are 100% spawn. I am throwing at the end of the map killing gunner - but challenge don’t count. Do you have any suggestion?


Thank you very much for your method, I followed everything and it worked well. Letting bots carry tomes are good since they can’t use their healing anymore. I was also using NB and drink/use every health item I see so the bots can’t pick up and heal.

I was dancing with the ratogre for 10 mins, though he only leaped twice and I couldn’t get the ratogre to leap on that road of stairs where I came down from. However the ratogre made 2 very short leaps on the road towards finish, he started both leaps on that grey box next to a bell (see red circle), both were really short leaps in terms of distance but the leap animation gives you just enough time to bomb him.

Now I only got Targeting Array left, which I have lots of trouble with :frowning:

2 Likes

If no system messages pops out mentioning you achieved XXX challenge, I guess you were not far enough or maybe bots killed it.

I did “Bombardment” on Fortunes of War Recruit too. There are 2 gunners at the very beginning, if you failed you can simply restart the map. Once you achieved it, you will have to finish the map to complete it.

You can have:
Kruber carry a shotgun, or just use Grail Knight
Sienna flamestorm staff
Salty WHC with Griffon-foot

So the bots won’t have a chance messing up your kill

1 Like

Does the “not miss” only apply to secondary fire or do you have to not use the gun at all between Monsters ?

When I looked at the code, it was hard to tell. Either a dev or someone else would have to tell you, unfortunately because I can’t undo the achievement to test it.

Thank you for the challenge guide. It has helped me immensely. Is there any chance you’ll make more challenge guides for different careers though?

Glad to hear it helped. I probably won’t be making other challenge guides because it takes a fair bit of time and I don’t have the motivation to do it like I did back then. A couple of the mods I used to use for testing back then also don’t work any more which gives me even less incentive to do things like this.